

PIM Manager documentation · Verified against PIM Manager 3.0.23.3 on Nov 3, 2026
Setup
Installing a privileged-access product touches Azure, Microsoft Entra ID, a database and often Exchange Online, and a half-finished install is worse than none. PIM Manager installs in one guided run that checks your rights first, shows its plan, and does not call itself done until a final check passes.
Prerequisites
Check these before you start. The installer checks most of them and stops before any change when one is missing.
Microsoft licenses
- Microsoft Entra ID P2 or Microsoft Entra ID Governance for the users who use PIM: PIM for Entra roles, PIM for Groups, PIM for Azure resources and access reviews are Microsoft features that need one of these licenses. Microsoft’s licensing fundamentals decide which users need one. PIM Manager checks that the tenant has the Entra ID P2 service plan; if you are licensed through Entra ID Governance only, you confirm that check in PIM Manager.
Azure rights
- An Azure subscription in the tenant you want to govern.
- Owner on that subscription, or Contributor plus User Access Administrator.
- For the engine’s Reader at the tenant root management group, so it sees every management group and subscription: Owner or User Access Administrator at the tenant root. Owner of one subscription is not enough. A Global Administrator can get this right by elevating access in Microsoft Entra ID. Without it, the step becomes a warning with the command for the right person.
Entra rights
- Privileged Role Administrator or Global Administrator, active, for the Microsoft Graph permissions and the role-assignable database admin group.
- Application Administrator for the Manager’s sign-in app registration and its consent.
- Groups Administrator for the database admin group and, if you choose it, the members-only sign-in group.
- Optionally, Exchange Administrator for the notification mailbox. Without it, that step becomes a warning with the command for the right person.
The subscription
- Resource providers registered: Microsoft.App, Microsoft.ContainerRegistry, Microsoft.Sql, Microsoft.OperationalInsights, Microsoft.ManagedIdentity and Microsoft.Network. The installer checks them and stops if one is missing; ask a subscription Owner to register them under Subscriptions > Resource providers.
- Azure Policy: check the policies assigned to the subscription. A policy that denies public network access, limits the allowed regions or requires tags can refuse a resource the install creates.
- Region: the installer checks that the region you choose offers every service PIM Manager needs.
Your machine
Azure Cloud Shell, or PowerShell on Windows. The install signs you in through your browser. It needs no client secret, no certificate and no PowerShell modules, and it refuses a sign-in that lands in another tenant or subscription.
Install: two lines
Every edition installs with the same two lines: the first downloads the installer, the second runs it with your tenant and subscription. Only the first line differs.
Pro and trial – the installer from Invardia:
Invoke-WebRequest https://invardia.com/support/pim/Start-PimManagerInstall.ps1 -OutFile Start-PimManagerInstall.ps1
.\Start-PimManagerInstall.ps1 -TenantId '<tenant id>' -SubscriptionId '<subscription id>'
Community – the installer from the public GitHub release:
Invoke-WebRequest https://github.com/KnudsenMorten/PIM4EntraPS/releases/latest/download/Start-PimManagerInstall.ps1 -OutFile Start-PimManagerInstall.ps1
.\Start-PimManagerInstall.ps1 -TenantId '<tenant id>' -SubscriptionId '<subscription id>'
To see the plan first, add -WhatIf to the second line: it checks your sign-in, rights, subscription and region and lists every step, and changes nothing. Add a parameter only when you want something other than the default, for example -Location <region>, -SuperAdmins <upn> or -AlertRecipients <address>; Install-PimManager lists them all. A Pro or trial installation runs unlicensed until Invardia assigns the license; nothing else is needed for that.
The installer then:
- checks the answers, the license, your sign-in, your rights and the subscription, and stops before any change if something is missing;
- checks that the chosen Azure region offers every service PIM Manager needs;
- deploys the resource group, network, container registry, Log Analytics workspace, Azure SQL server and database, managed identities, the Container Apps environment, PIM Manager and its jobs;
- grants the engine its permissions and PIM Manager its read-only set, creates one database user and one database role per component, and makes a role-assignable group the database’s Entra administrator;
- creates the Manager’s sign-in app registration with assignment required, puts the sign-in front in front of PIM Manager, and records your first SuperAdmins;
- registers the license;
- sets up the notification mailbox when you hold Exchange Administrator;
- runs the end-of-install check, which reads every result back, repairs what it can, and prints one line per item with the fix.
If a step fails, fix the cause and resume with the command the installer prints; finished steps are skipped.
Where the install time goes
Most of the time is Azure creating the SQL server and the Container Apps environment and building the image in your registry; the installer shows each step as it runs. Plan extra time for what the run does not do for you: getting the Microsoft licenses and the admin roles in place before you start, the hub network owner’s step for a private installation, and the steps that Get Started lists afterwards. What the installation costs to run each month is on Sizing, and Invardia’s cost calculator shows the license and the Azure resources for your size. The script pages describe every object, permission and scope: Install-PimManager, Invoke-PimDeployAll and Confirm-PimInstall.
No Invardia Support app is created. If you later want Invardia to look inside your installation for a support case, see Support access.
Public or private
You choose the network mode when the environment is built:
- Public: PIM Manager is reachable over the internet, always behind Microsoft Entra sign-in. This is the default.
- Private: PIM Manager is reachable only from your virtual network and peered clients, and the database gets a private endpoint with public access off. To build private from the start, add
-PrivateNetworkto the second install line, with the values of your network when you use your own (for example-VnetId,-HubVnetId,-PrivateDnsZonesResourceGroupId; see Install-PimManager). Before it creates anything, the installer checks the network, the hub and every private DNS zone the installation needs, and lists everything that is missing at once. The hub network owner runs a prepared script for the peering and DNS links: New-PimHubPrepareScript.
A public environment can be rebuilt as private with Convert-PimToPrivate, which runs every step of the conversion in order and keeps your data; the Manager’s address changes. Private is recommended for production.
After the install: Get Started
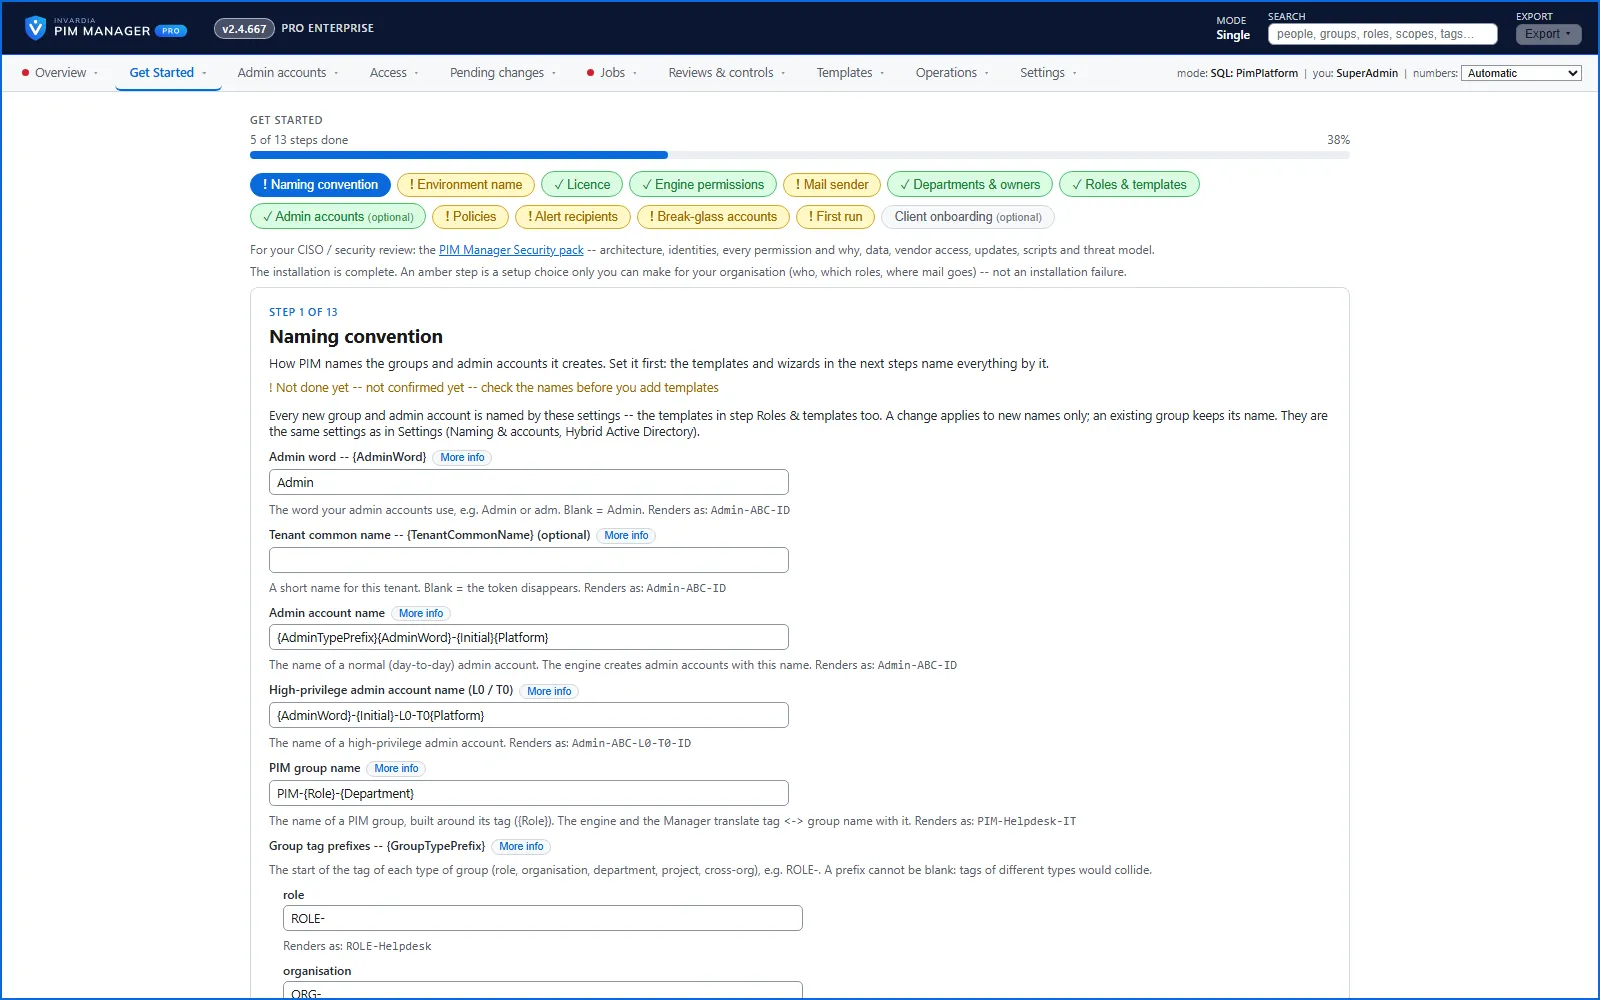
Sign in to PIM Manager. Get Started lists what is still open, such as engine permissions, the mail sender, departments and owners, policies, alert recipients and break-glass accounts. When a step needs someone with more rights than PIM Manager has, the page shows the command with your values filled in. Every command is two lines: one downloads the script from Invardia, one runs it. For example:
Invoke-WebRequest https://invardia.com/support/pim/Grant-PimEnginePermissions.ps1 -OutFile .\Grant-PimEnginePermissions.ps1
.\Grant-PimEnginePermissions.ps1 -TenantId <tenant id> -EngineObjectId <engine object id> -PlanOnly
Run with -PlanOnly or -WhatIf first to see the plan, then run again without it. PIM Manager does not grant permissions itself: an identity that could, could give itself anything.
Start the engine right after a commit
The guided install does not give PIM Manager the right to start the engine job, so a commit or Run now waits for the engine’s next scheduled start, within about five minutes. To start it at once, someone with Owner or User Access Administrator on the PIM resource group assigns the Azure role Container Apps Jobs Operator to PIM Manager’s managed identity, scoped to the engine job only (Azure portal: the engine job > Access control (IAM)). The role can start, stop and read that one job. On a Pro installation, the next update then records the engine job in PIM Manager’s settings, and from then on a commit starts the engine at once. See Identities.
The scripts Get Started names most often:
| Script | What it does |
|---|---|
| Grant-PimEnginePermissions | Gives the engine identity the Graph permissions and Azure roles the command names, which are the ones PIM Manager found missing |
| Initialize-PimMailSender | Creates the sender mailbox and a send right scoped to that one mailbox |
| Set-PimLicense | Registers a license file when it cannot be done under Settings > Licence |
| Initialize-PimWorkloadPrereqs | Checks and fixes what one workload needs, such as Power BI or Defender XDR |
| Set-PimSqlTier | Sets the database tier and maximum size, and optionally pins the tier |
Remove the old sign-in secret
The install creates a client secret on the Manager’s sign-in app registration, valid for 2 years, for the built-in sign-in it falls back to if the sign-in front does not answer. The sign-in front does not use it. Once people sign in through the front, remove it in the Microsoft Entra admin center and the Azure portal; the steps are in Sign-in.
Community edition
The Community edition installs from the public GitHub release into your own subscription, with the two Community lines under Install: two lines – the same installer and the same second line as Pro. You need PowerShell 7, and you sign in as an administrator who is Owner of the subscription and Privileged Role Administrator in Microsoft Entra ID. No git, no clone and no deploy identity are needed.
Updates. The updater job updates the installation every night from the signed public release. Updates are described in Updates.
To move to Pro, register a Pro license under Settings > Licence; nothing is reinstalled.
Remove it
This is the one place that describes removing PIM Manager. Other pages link here.
Removing PIM Manager does not remove what the engine built in your tenant. The admin accounts, groups, role assignments and PIM policies stay and keep working. Nothing extends a time-bound assignment any more, so each one ends on its end date, and drift is no longer reported.
- Export what you want to keep. Export your configuration as JSON from Settings. If you need the audit trail and the commit journal, export the database as well; step 3 deletes it.
- End support access, if you created the Invardia Support app: follow How you end it.
- Delete the PIM resource group. This removes PIM Manager, the engine and the updater jobs with their managed identities, the database and all stored data, the container registry, the Log Analytics workspace, the network and the storage. The Key Vault is soft-deleted and, because purge protection is on, kept for 90 days before Azure removes it; its name cannot be reused in that time. If you use the hybrid worker (Pro; not in Community), remove it first with Remove-PimHybridWorker, which also prints the clean-up for your Active Directory administrator.
- Remove what the install created outside the resource group:
- the Manager’s sign-in app registration (Application Administrator), and the members-only sign-in group if you let every member account sign in. Deleting the registration also removes any client secret still on it, including the old sign-in secret;
- the database admin group, which is role-assignable, so a Privileged Role Administrator deletes it;
- the role assignments of the deleted identities at the tenant root management group and on the hosting subscription, which Azure then shows as “Identity not found” (Owner or User Access Administrator at that scope). The Graph permissions of the managed identities go with the identities in step 3.
- Remove the mail sender, if you set it up: in Exchange Online remove the scoped Application Mail.Send role assignments and the management scope, then the shared sender mailbox. Initialize-PimMailSender names each object.
- Remove the PIM Activator, if you deployed it: take it out of your Edge for Business or Intune policy and delete its app registration.
- Pro editions (Community: nothing to do here): tell Invardia at support@invardia.com that you removed the installation, so Invardia closes its record of the installation in the customer portal. This is a change on Invardia’s side only; nothing is done in your tenant.
Install-PimManager and Invoke-PimDeployAll list every object an install creates, with its undo.
Not an uninstall
Remove-PimContainerStack removes only the Container Apps part of an installation (PIM Manager, the jobs and the Container Apps environment) and the Azure role assignments of their identities. It keeps the database, the registry, the Key Vault, the storage, the network and Log Analytics. Use it to rebuild an installation with the other network mode, followed by a new deploy; it does not remove PIM Manager or its data.
Verified against PIM Manager 3.0.23.3 on Nov 3, 2026Download PDF