

PIM Manager documentation · Verified against PIM Manager 3.0.23.3 on Nov 3, 2026
How to approve a held policy change
One changed policy setting, such as approval on activation or the activation length, can loosen the protection of many roles in one run. PIM Manager therefore holds every policy change set until a SuperAdmin of the tenant has seen it and approved it. This guide shows where held changes wait, how to read them and how to approve them.
Where held changes come from
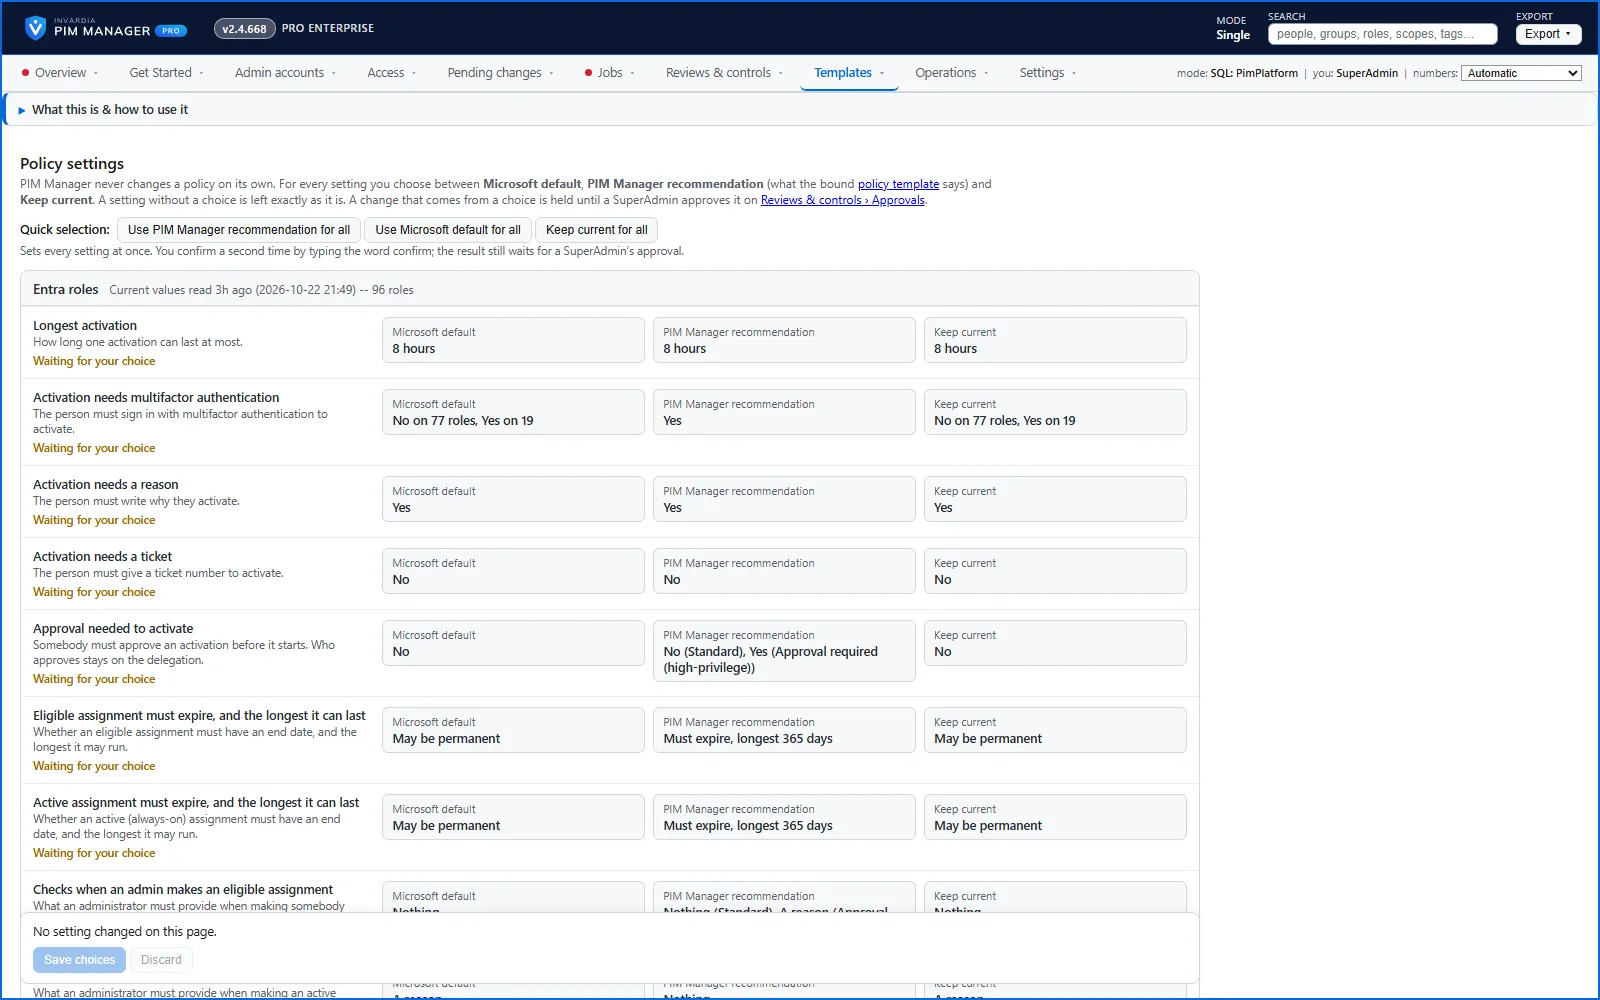
PIM Manager changes a PIM policy only where you chose to. On Templates > Policy settings you choose, per setting, Microsoft default, PIM Manager recommendation or Keep current, and press Save choices. Saving changes nothing in your tenant. On its next run, the policy job compares your choices with the live policies and records what would change as a held change set, one per policy type: PIM for Groups, Entra roles and Azure roles. Nothing is written to those policies until a SuperAdmin approves.
A held change set also appears in the Policies step of Get Started, with the same panel and the same buttons.
What you need
- To read the held changes and download them: the Admin role in PIM Manager.
- To approve them: the SuperAdmin role. Other roles see the text A SuperAdmin approves this change set. instead of the button.
Step 1: open the held changes
- Open Reviews & controls > Approvals. A red number on the menu means something waits for a person.
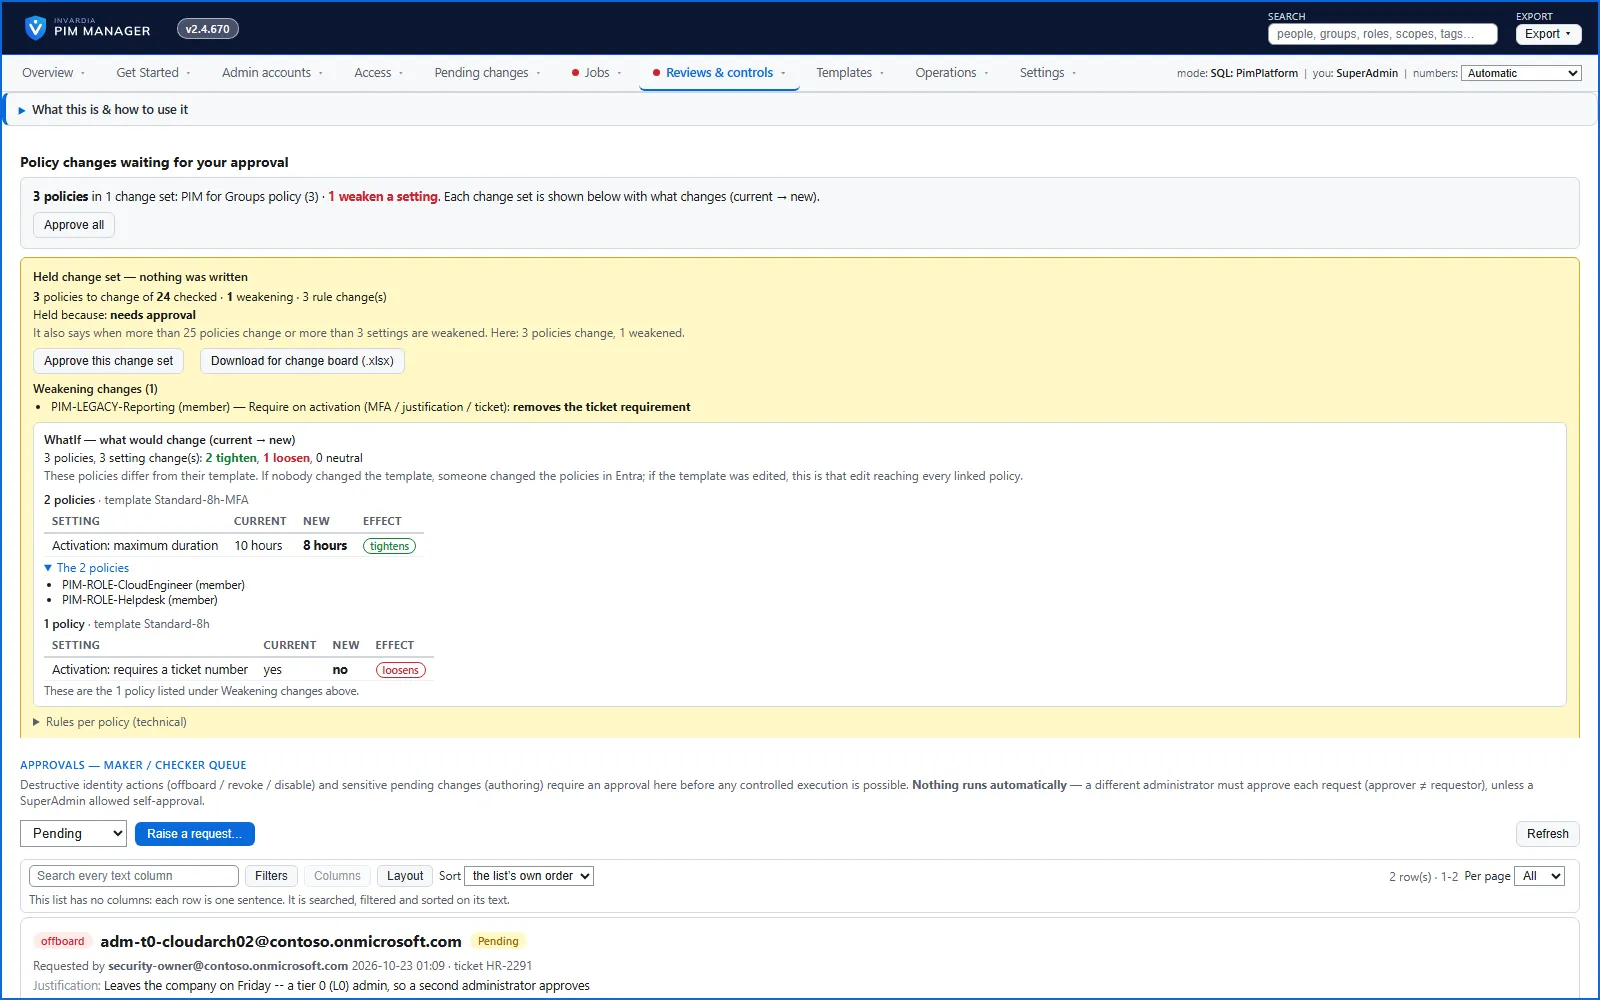
- Under Policy changes waiting for your approval, the summary line names how many policies change, in how many change sets, and how many of the changes weaken a setting.
Step 2: read each change set
Each change set has its own box, headed Held change set — nothing was written. Read it from the top:
- The counts: how many policies change of how many were checked, and how many changes weaken a setting.
- Held because: the reasons in words. needs approval is always there; many policies change or settings are weakened are added when the set is large or loosens many settings.
- Weakening changes: each policy whose change loosens a setting, the setting by name and the change, for example Require on activation (MFA / justification / ticket): removes the ticket requirement.
- WhatIf — what would change (current → new): the totals (how many settings tighten, loosen or stay neutral) and the reason the policies differ, then, per group of policies that get the same change, a table with Setting, Current, New and Effect. The effect is tightens, loosens or neutral. Policies that are still at Entra’s defaults are marked as the first time the template is applied.
- The policies under each group: every policy the change touches, one per line. A group whose policies are already listed under Weakening changes says so instead of listing them twice.
- Rules per policy (technical), folded at the bottom: each policy’s template and the policy rules that change, by name, such as Maximum activation duration, Approval to activate or Require on activation (MFA / justification / ticket). Point at a name to see the rule’s id in Microsoft Graph.
To hand the change set to a change board, press Download for change board (.xlsx). The file lists every policy and setting with its current and new value.
Step 3: approve
Approve one change set, or all of them at once.
- One change set: press Approve this change set in its box and confirm. The message reads Approved. The engine makes exactly these changes on its next run.
- All change sets: press Approve all in the summary bar and confirm. PIM Manager approves each waiting change set separately, exactly as if you had pressed Approve this change set in each box: each approval covers that set’s own exact plan and gets its own audit record. It then starts the policy jobs at once, so you do not start them yourself on the Jobs page. If one set cannot be approved, the message names it and the others stay approved.
The approval covers exactly the change set you saw. If the next run finds a different set of changes, or the policy job has not run within the time the message names (24 hours by default), the change set is held again with its new content, and you approve it again.
Who may approve
Any SuperAdmin can approve a change set, including the SuperAdmin who saved the choices. A single SuperAdmin can therefore save a weaker setting, for example no approval on Global Administrator, and approve it alone. No setting in PIM Manager requires a different person for a policy change set; the switches for a second person cover other changes (offboarding and revoke requests, guard releases and sensitive commits).
To have a second person on policy changes, make it your procedure: one SuperAdmin saves the choices and a different SuperAdmin approves. The audit trail records who saved the choices and who approved the change set, so you can check that the two differ. Keep the number of SuperAdmins small.
Check the result
- The message under the button turns green and names what happens next. A red Not approved message gives the reason, for example that the change set changed while you read it; reload the page and review the current one.
- After the policy job runs, the change set is no longer listed under Policy changes waiting for your approval.
- Operations > Audit trail shows the approval with your name and the change set it covered.
- If a policy job fails, Jobs > Engine logs & errors names the policy and the reason.
Undo
An applied policy change has no undo button. To change a setting back:
- Open Templates > Policy settings and choose the value you want for that setting: Microsoft default or PIM Manager recommendation, whichever holds the value you want. Press Save choices.
- The change back is a new change set. It is held like any other, and a SuperAdmin approves it on Reviews & controls > Approvals.
To set a value that neither choice holds, change it in Entra ID or Azure yourself and choose Keep current for that setting, so PIM Manager leaves it as it is.
Related pages
Verified against PIM Manager 3.0.23.3 on Nov 3, 2026Download PDF
← How to enable access reviewsHow to add a break-glass account →