

PIM Manager documentation · Verified against PIM Manager 3.0.23.3 on Nov 3, 2026
How to add a break-glass account
PIM Manager can disable admin accounts, revoke their access and sign them out. Your emergency accounts must stay out of reach of those actions, or a bulk revoke or an offboarding could lock you out of your own tenant. This guide puts an emergency account on PIM Manager’s break-glass list.
What the list does
An account on the list is skipped by PIM Manager’s own revoke, disable, session-revoke and offboard actions, in PIM Manager and in the engine. PIM Manager and the engine read the same list, which is stored in the PIM database, and every change to it is audited.
The list protects the accounts from PIM Manager only. It does not create the accounts, and it does not exclude them from your Conditional Access policies; both stay with you in Entra ID.
What you need
- The emergency accounts exist in Entra ID. You need their sign-in names (UPN).
- The SuperAdmin role in PIM Manager.
- A second SuperAdmin to approve, or self-approval switched on. An account on the list is exempt from PIM Manager’s revoke, disable and offboard actions, so a change to the list is a request: one SuperAdmin raises it and a different SuperAdmin approves it. When Allow an administrator to approve their own requests is on (Settings > Approvals & policy), the SuperAdmin who raised the request can approve it too. See With only one SuperAdmin.
Step 1: request the change
-
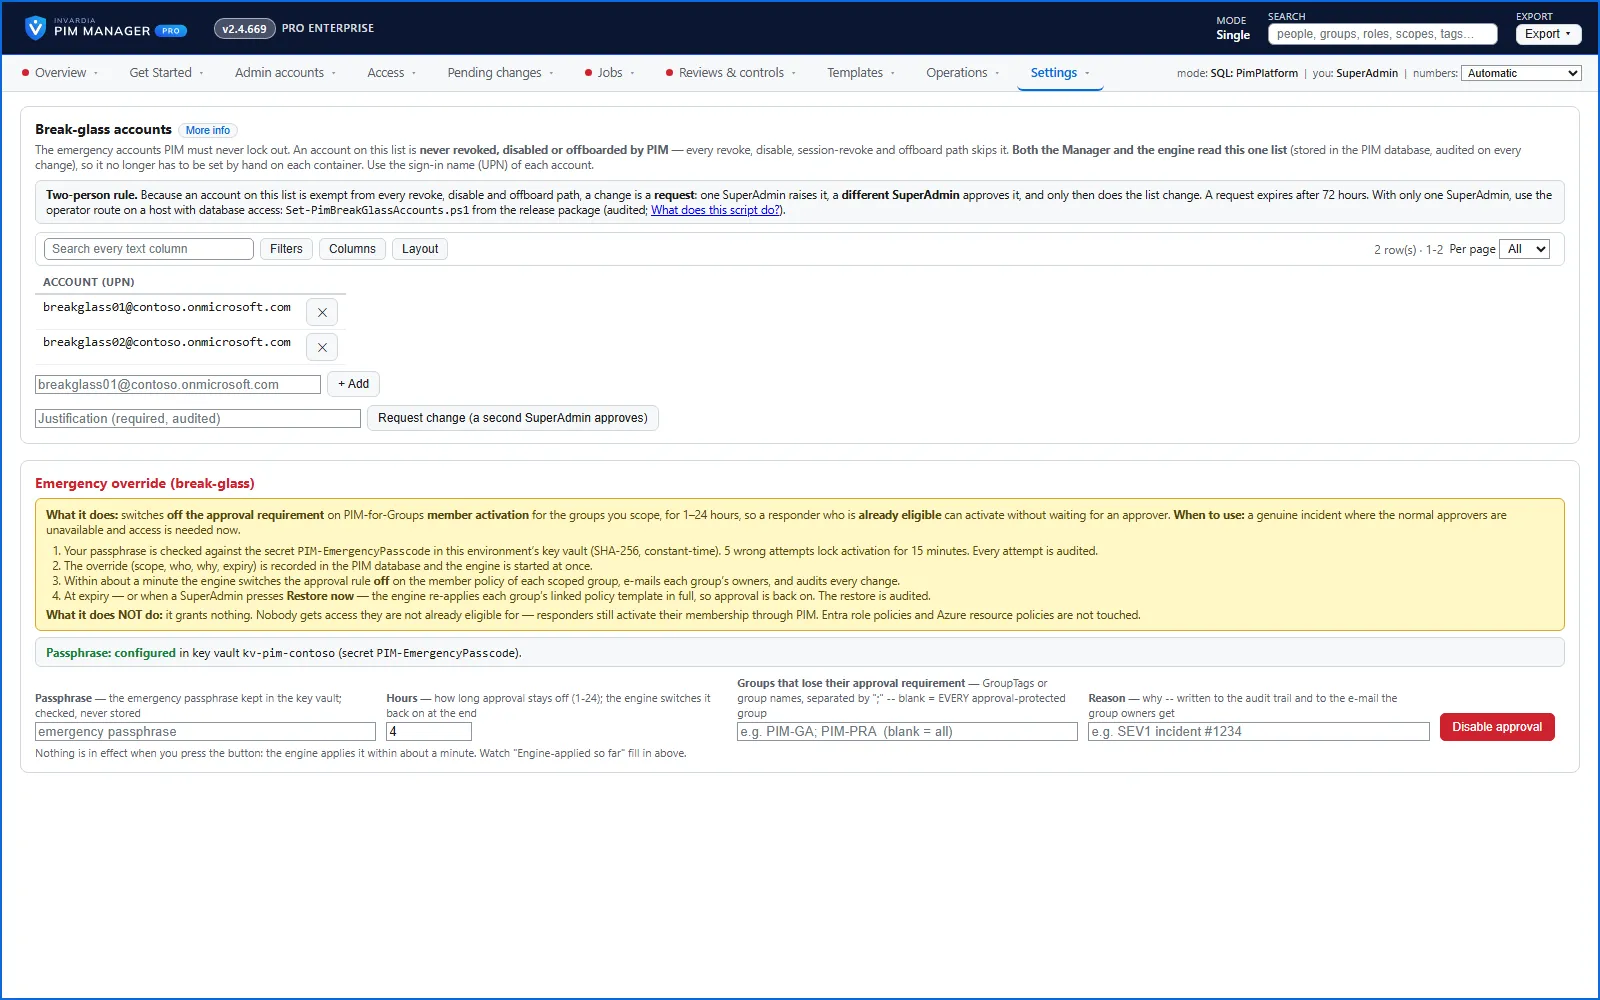
Open Settings > Emergency access (break-glass). The Break-glass accounts card shows the accounts on the list. When it is empty, it says No break-glass accounts defined.
-
Type the account’s sign-in name in the box (for example
breakglass01@contoso.example) and press + Add. Repeat for each emergency account. -
In Justification (required, audited), say why, for example The two cloud-only emergency accounts.
-
Press Request change (a second SuperAdmin approves). With self-approval on, the button reads Request change.
-
When a dialog explains what adding an account does, read it and confirm.
The card shows Request raised – awaiting approval by another SuperAdmin, with the time the request expires. Nothing on the list has changed yet. A request expires after 72 hours by default.
You can also add the accounts in the Break-glass accounts step of Get Started: Add accounts (search by name), then Why (kept with the request). It raises the same request.
Step 2: approve the change
The second SuperAdmin does this.
- Open Settings > Emergency access (break-glass). A yellow box shows Change requested by and the requester’s name, the justification, the expiry and What it changes: the accounts added (+) and removed (−).
- Optionally write a Note (optional, audited).
- Press Approve and apply and confirm. The change applies at once. To refuse it, press Reject.
The requester can withdraw an open request with Cancel my request. Only one request can be open at a time.
Check the result
- The Break-glass accounts table lists the accounts, and the card shows the last change request with its status and who decided it.
- On Reviews & controls > Delegation overview (All privileged permissions), tick show break-glass accounts. The accounts are marked as break-glass. A revoke that includes them (Pro editions; not in Community) skips them and says so.
- Operations > Audit trail records the request and the decision.
Undo
Removing an account is a request too.
- On Settings > Emergency access (break-glass), press ✕ next to the account, fill in Justification (required, audited) and press the request button.
- A second SuperAdmin approves it.
If the request would leave the list empty, PIM Manager asks you to confirm an empty list first: once it is approved, no emergency account is protected from PIM Manager.
With only one SuperAdmin
With a single SuperAdmin, nobody else can approve. Use self-approval:
- Open Settings > Approvals & policy and switch on Allow an administrator to approve their own requests. The change is in the audit trail.
- Do Step 1. The button reads Request change.
- On the same card, press Approve. The card says Self-approval is on, so you can approve your own request. The audit trail records the approval as self-approved.
- Switch Allow an administrator to approve their own requests off again if you do not want it for other requests. While it is on, it also lets an administrator approve their own offboard, revoke and other approval requests.
The better long-term answer is a second named SuperAdmin; assign one on Settings > Manager access & roles.
Without PIM Manager
The screen also names the script Set-PimBreakGlassAccounts. It writes the list straight to the PIM database, for when PIM Manager itself cannot be used, for example while it is down. Unlike the scripts you download on their own, it runs from the PIM Manager release package folder that the install downloaded and verified (see Setup scripts). It needs:
- a person who is a member of the installation’s database admin group. After the install that group holds no person, and adding one needs a Global Administrator, a Privileged Role Administrator or an owner of the group, because the group is role-assignable;
- that person’s browser sign-in (
-UseSignedInAccount), or an admin application’s certificate on the computer. It needs no Azure CLI and no PowerShell modules.
It replaces the list with a justification, writes an audit event, and prints the list it replaced so you can put it back. Run it with -WhatIf first to see what it would add and remove. If you cannot meet these needs, use self-approval as above, or ask a second SuperAdmin.
Related pages
Verified against PIM Manager 3.0.23.3 on Nov 3, 2026Download PDF
← How to approve a held policy changeHow to install the PIM Activator without Intune →