

PIM Manager documentation · Verified against PIM Manager 3.0.23.3 on Nov 3, 2026
Migration
Most tenants come to PIM v2 with standing (permanent) assignments and with roles made eligible person by person. This page shows how to move them into nested groups with PIM Manager: see what exists, adopt what you keep, review the plan, and only then remove the old access.
The problem
A migration of privileged access has two ways to fail. Remove too early, and an administrator loses access in the middle of an incident. Remove too late, or not at all, and the old standing access stays next to the new model forever. A tool that “syncs” the tenant to a half-built model makes both worse.
PIM Manager avoids this by design: it changes only what your model defines, so you can build the new model next to the old access and remove the old access step by step.
What stays untouched
Until you define something, PIM Manager leaves it alone:
- Only what you define. The engine changes a group, admin, role assignment or policy only when a row in your model defines it. The engine does not touch groups, roles and admins that no row in your model names; a SuperAdmin can still delete or revoke them by hand (see step 6).
- An empty model changes nothing. If the model defines nothing, the engine changes nothing.
- Removal follows your commits. The engine removes live access when a row says Remove, or when a commit took away the definition of access PIM Manager put in place (the daily reconcile’s removal of leftovers, see Settings). It removes nothing from an area it has no definitions for.
- Access it did not create. Assignments that PIM Manager did not create are left alone; you remove them on purpose (step 6).
- Break-glass accounts. Accounts on the break-glass list are not disabled, revoked or offboarded.
- Policies. PIM Manager changes no PIM policy setting until you choose a value for it, and each policy change waits for a SuperAdmin of your tenant to approve it.
Step by step
1. See what exists
Start read-only. Nothing in this step changes the tenant.
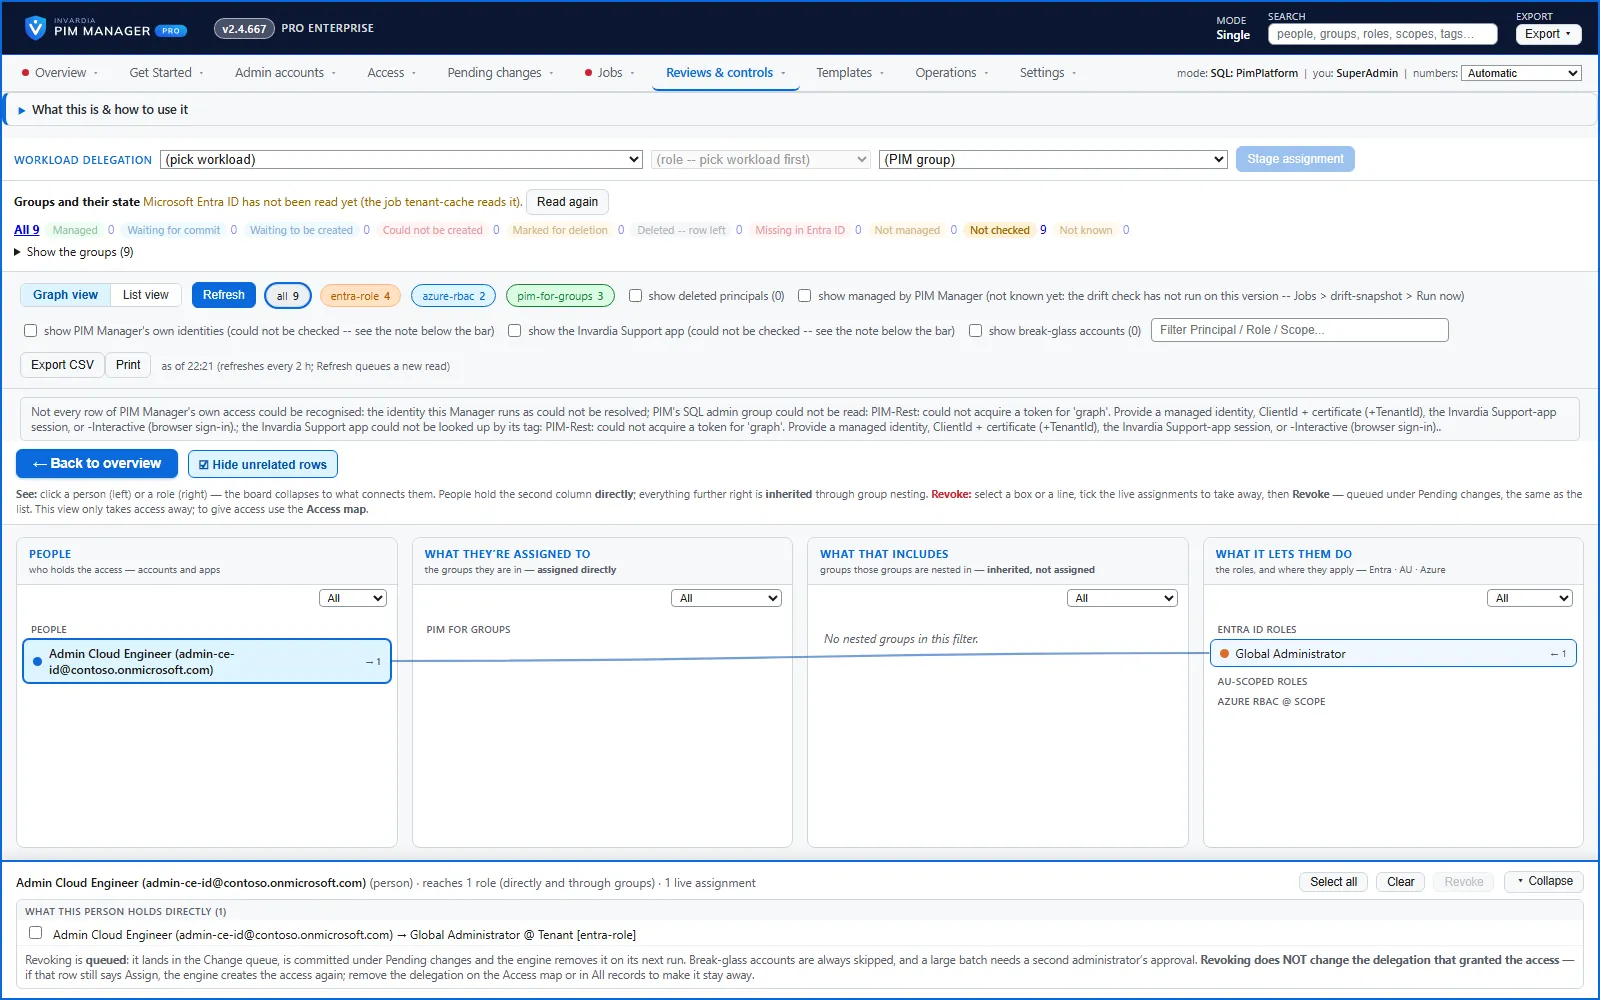
- Reviews & controls > Delegation overview (All privileged permissions) lists the active privileged assignments in the tenant: Entra roles, Azure roles and PIM for Groups. The graph view shows, per person, what they hold directly and through groups. This is your standing-access list.
- Reviews & controls > Drift: live vs desired lists, for an area with no definitions yet, everything live there as extra, so access made by hand is visible.
- Access > Discovery and gaps lists the Entra ID, Intune and Defender XDR roles, Power BI workspaces, Azure subscriptions, management groups and administrative units that nothing delegates yet, plus groups that hold nothing and privileged groups PIM Manager does not manage. Available in Pro editions; not in Community.
- Reviews & controls > Reports > Tier impact lists everyone who can reach a Tier-0 or Tier-1 target in your model. Available in Pro editions; not in Community.
- Eligible assignments made directly to people (PIM v1) are not on Delegation overview, which lists active assignments. List them in the Microsoft Entra admin center under Privileged Identity Management > Microsoft Entra roles > Assignments > Eligible assignments, and under Azure resources for each scope, and export each list.
In the Community edition you work with Delegation overview, Drift with Import into PIM, permission templates and Import administrators. Discovery and gaps, Tier impact and revoking from the portal are available in Pro editions.
PIM v1 and PIM v2 are the two patterns described on Why PIM Manager: v1 makes roles eligible person by person, v2 grants them through nested groups.
2. Design the target model
Group the access you found into job functions (role groups) and capabilities (permission groups), classify them and pick your naming. See Nested groups, Tiers and levels and Naming.
3. Adopt what you keep
You do not have to recreate groups that already exist:
- Import into PIM. On the Drift page, an extra item has Import into PIM. It stages the row that defines the existing object. For a group, you choose which kind of group definition it becomes, and PIM Manager adopts the existing group by its exact name; it never creates a second one. An administrative unit made outside PIM Manager is adopted the same way.
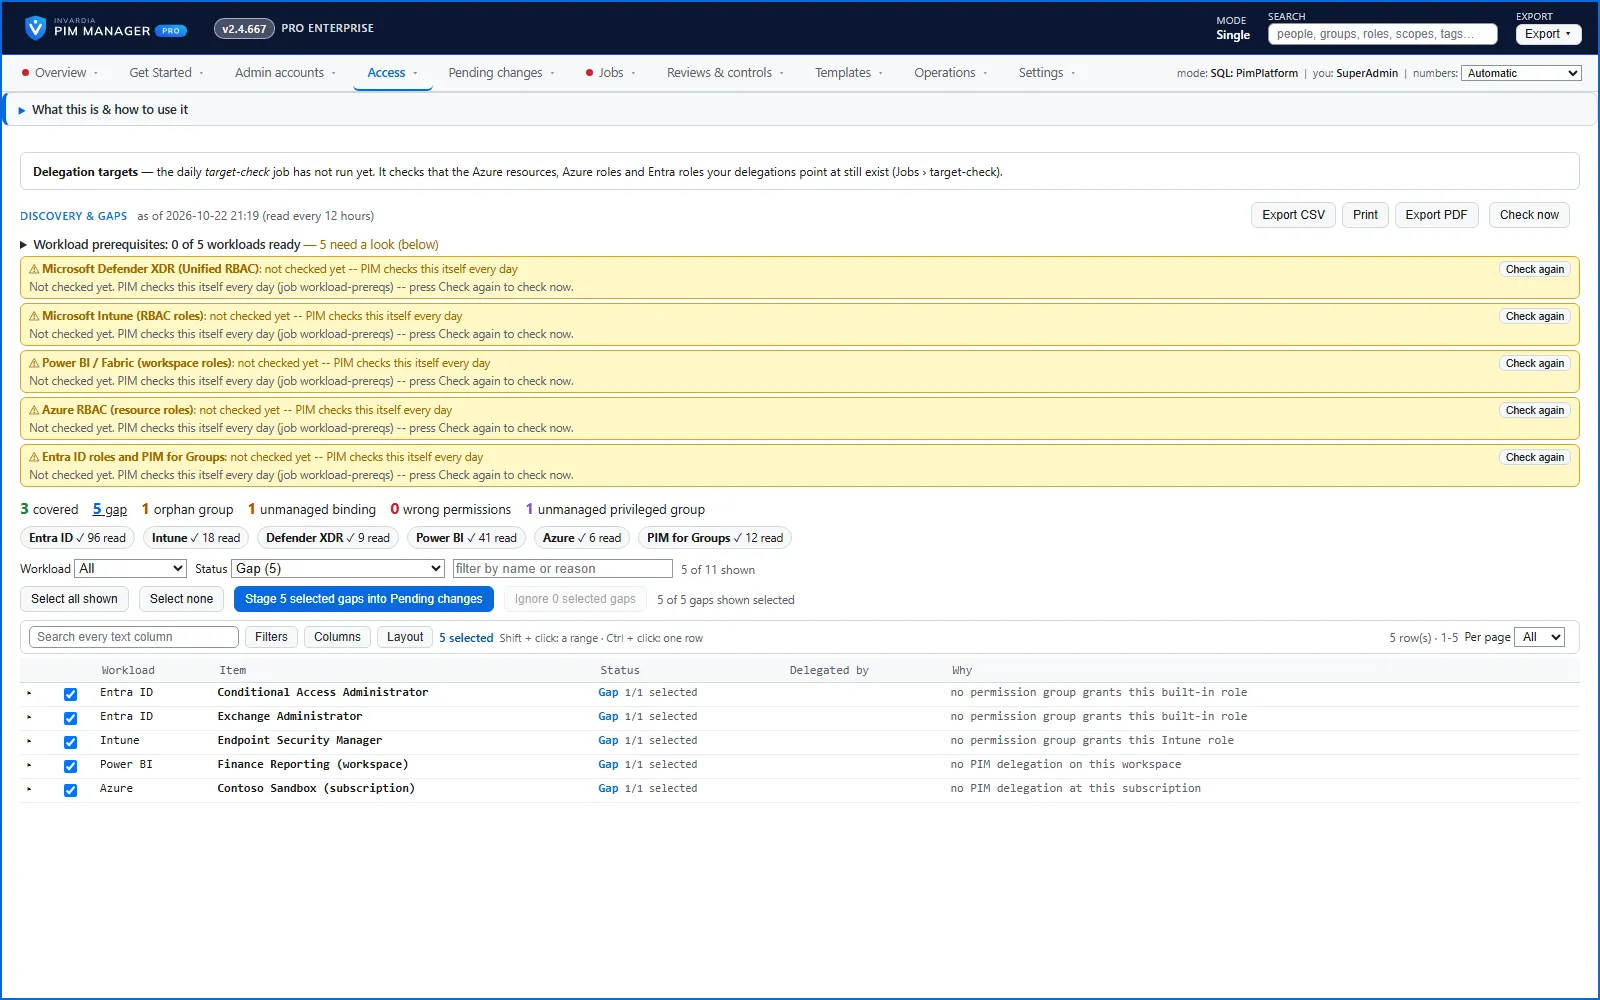
- Stage gaps. On Discovery and gaps, each gap has a ready proposal named by your convention. Tick the gaps and press Stage selected gaps into Pending changes. Available in Pro editions; not in Community.
- Permission templates. A permission template pack that names a group your model or tenant already has adopts that group instead of defining it again.
- Admin accounts. Admin accounts > Import administrators adds many admins to the model at once from a file or a paste, keyed on the UPN. A SuperAdmin does this.
Adoption matches the name only; it does not check a group’s owners, members or role-assignable flag. Check those before you commit, as described in Before you adopt a group.
4. Review the plan
Everything you build or adopt waits under Pending changes:
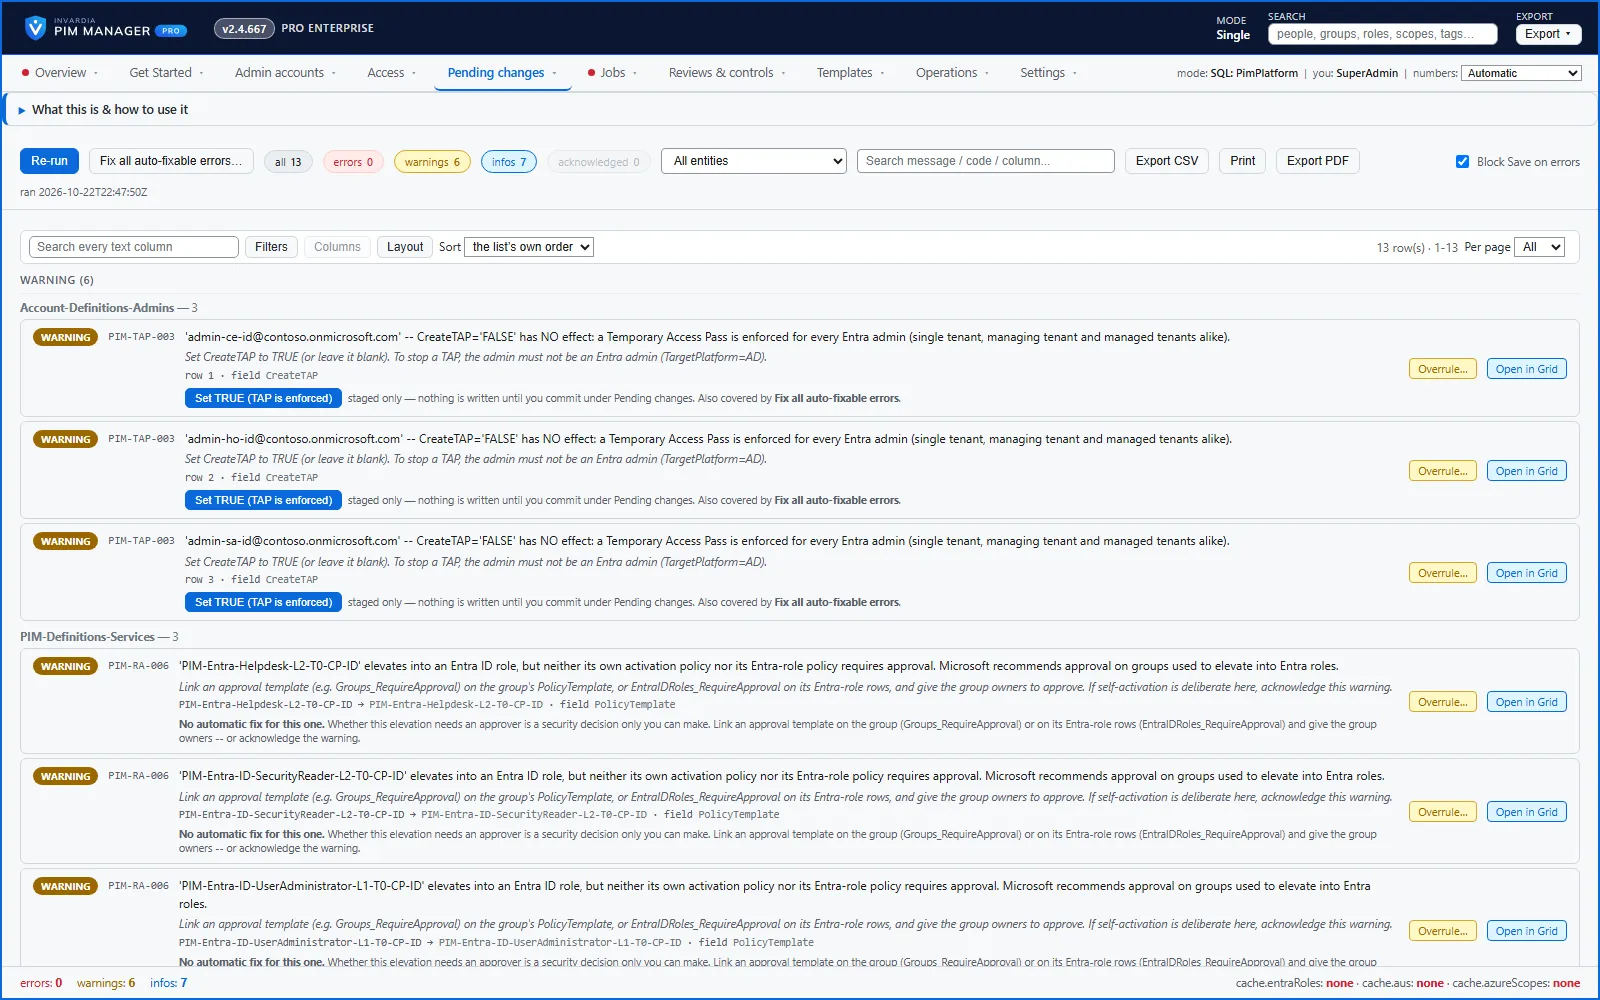
- Open Pending changes > Check for problems and fix every error. An error blocks the commit.
- Read the review: each staged row says what it creates, imports or deletes.
- Commit. The engine applies only the rows you committed.
After the next drift check, the Drift page should show the new groups and nestings as in sync.
5. Give the new path
Assign people to their role groups as Eligible. Ask each person to activate their role group, for example with the PIM Activator, and to confirm their work still runs. Check their path on Access > Access map.
6. Remove the old access
Only when a person’s new path works, remove the access they hold outside the model:
- Standing (active) assignments. On Delegation overview, select the assignments and press Revoke. An assignment PIM Manager does not manage, which is what most old access is, can be revoked only by a SuperAdmin. A revoke is queued under Pending changes with a mandatory justification, break-glass accounts are always skipped, and a batch over the safety threshold waits for a second administrator’s approval. Revoking from the portal is available in Pro editions; without Pro, remove the assignments in the Microsoft Entra admin center or the Azure portal.
- Eligible assignments made directly to people (the PIM v1 pattern). PIM Manager does not remove these automatically, because it did not create them. Remove them in the Microsoft Entra admin center or the Azure portal, or, where Delegation overview lists them, revoke them there as a SuperAdmin (Pro; not in Community).
A revoke does not change your model. If a row in your model still grants the access, the engine creates it again, so remove or change the row as well.
7. Confirm
Ask the Drift page for a fresh check and, in Pro editions (not in Community), the Tier impact report. The only Tier-0 paths left should be the role groups you designed and your break-glass accounts.
From CSV configuration files
If you keep your model in the CSV configuration files that the PowerShell scripts on GitHub use, a one-time import brings it into the database. The import reads the files without changing them, writes each file in one transaction, and names any file that fails. After the import, the database is the only store.
Verified against PIM Manager 3.0.23.3 on Nov 3, 2026Download PDF