

Roll out the PIM Activator from one guided page
One page takes you through deploying the browser extension: the sign-in apps, the settings, the Intune remediation, Edge for Business and PCs and servers without Intune.
Purpose
A browser extension for privileged access needs sign-in apps, settings on each device and a deployment policy. Assembling that from documentation is slow and easy to get wrong.
Design
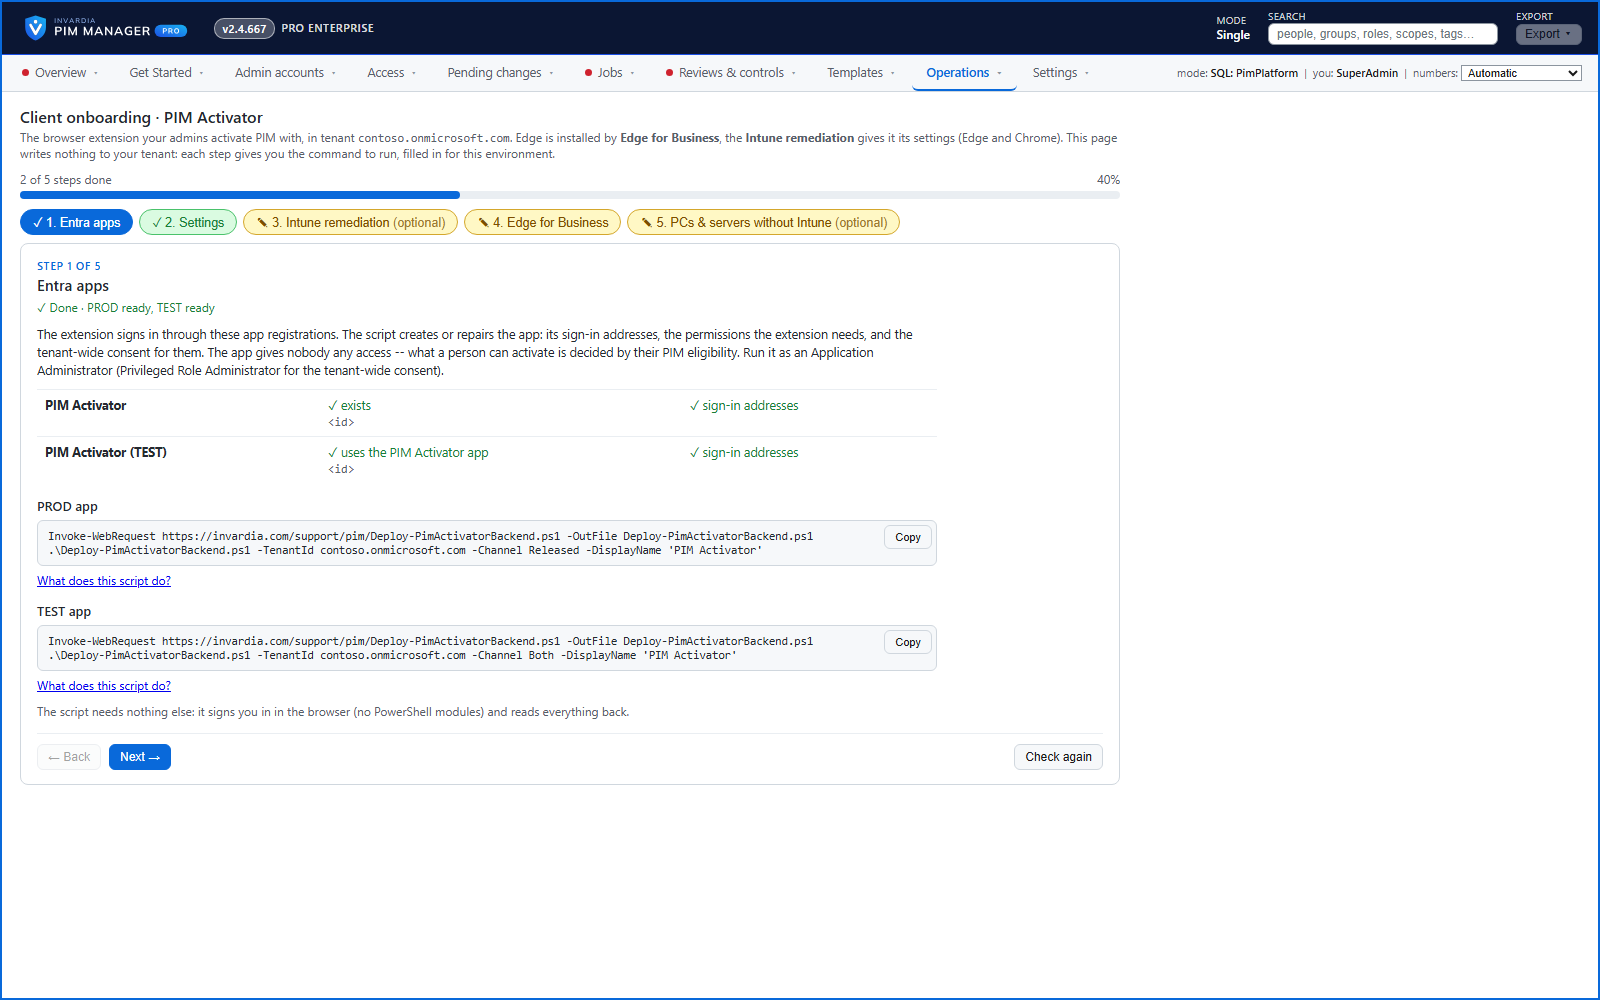
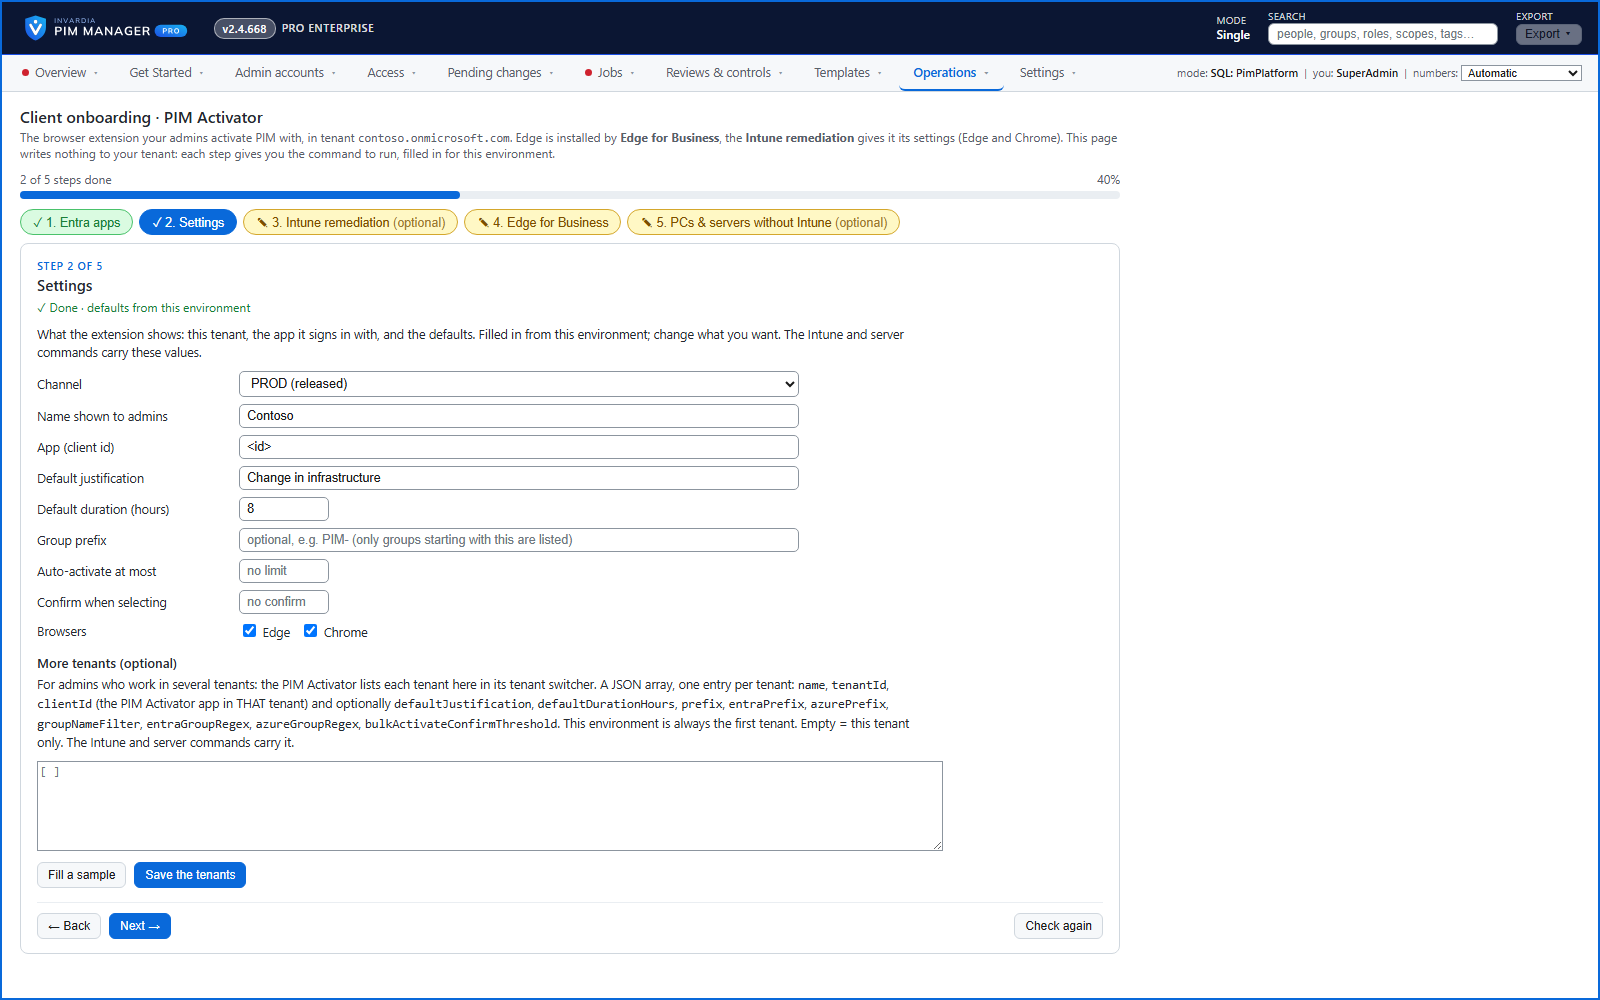
Operations > Client onboarding is a five-step guide. Step 1 checks that the PROD and TEST sign-in apps exist with the right sign-in addresses and offers to create or repair them with your own admin sign-in. Step 2 fills in the extension's settings from this environment: the name shown to admins, the app, the default justification and duration, the group prefix, the auto-activation cap, the confirm threshold and the browsers. Step 3 builds the Intune remediation that writes those settings to devices and can upload it and assign it to the group you choose. Step 4 gives you the values the Microsoft 365 admin center asks for in Edge for Business, and step 5 the command for PCs and servers without Intune.
Each step is marked done or open, so you can see what is left.
Business opportunities
The PIM Activator reaches your admins' managed devices in an afternoon, without a separate deployment project.
Related features
PIM Activator: activate the access you need, together
A browser extension for Edge and Chrome: tick the groups and roles you need, give one justification and activate them together - three clicks for a typical activation.
An engine that keeps your tenant matching your model
You describe the access you want; the engine creates the groups, owners, policies, assignments and access passes your data defines, and keeps them that way.
Get Started: the steps to a working environment
A guided list of the steps that make an environment work - each marked done or still open from your own data.
Admin accounts with the full lifecycle
Create admin accounts on a future date, hand over a first-time Temporary Access Pass safely, and disable them on an auto-disable date.